
Art and Robots
In which Sugar vs the Reef artist, and veteran sculptor Kim Williams recounts our first steps into the high tech world of manufacturing robots…
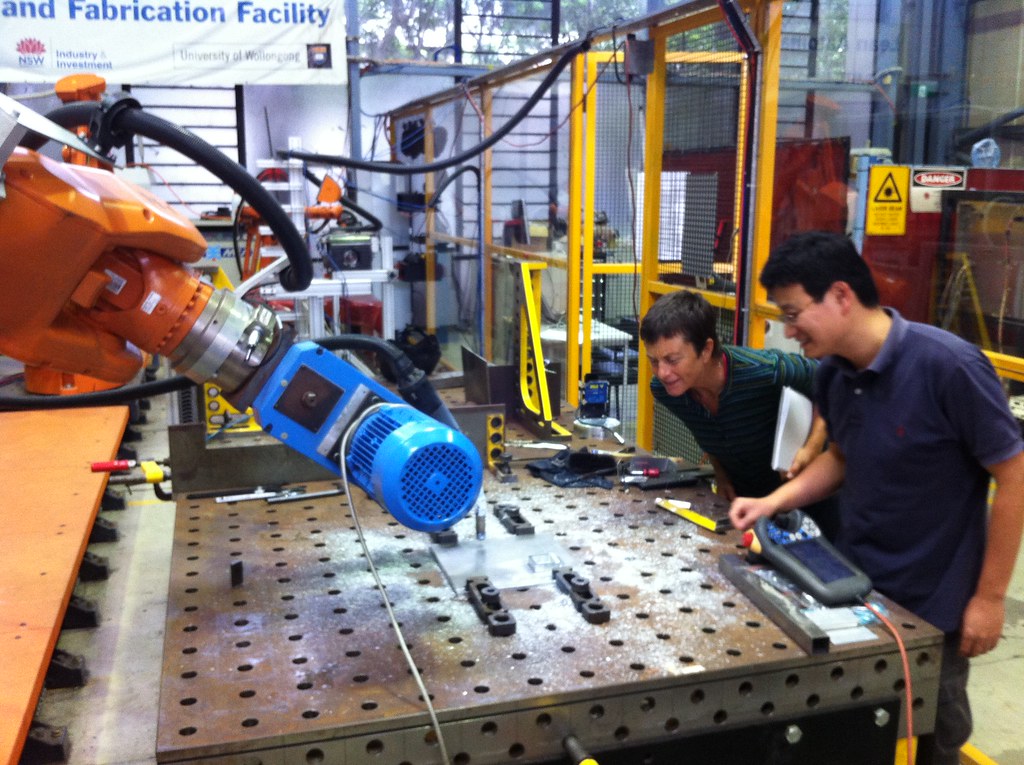
Today Lucas and I visited a large, high-ceilinged industrial scale workshop at the rear of Building 39. It is the site where our 3d model of the Mackay catchment is being fabricated.
Earlier this year we took up a serendipitous opportunity: Zengxi Pan, an Engineering and Robotics fellow, wanted to work with artists for a Global Challenges grant. At that time this we were already planning to build a 3-d model for the Sugar vs the Reef project that Lucas is driving. It was an opportunity too good to resist.
At our first meeting with Zengxi (Stephen), he confidently predicted that the robots could do everything we wanted them to do and more. It was as if the robots could cancel out human effort entirely, once you gave them the correct commands. We went away from that first meeting amazed and amused that a problem that we had on our list to solve (but which we had no idea how to solve) was effectively being solved for us.

Since then we have been liaising with Zengxi and his research fellow Donghong Ding, an affable young man who is doing all the hard work. My role as research assistant in this 3d project is to do some of the background work. I’ve sourced the data set that was needed for the model and have done materials research and of course met with Lucas, Stephen and Donghong on a fairly regular basis over the last two or three months.
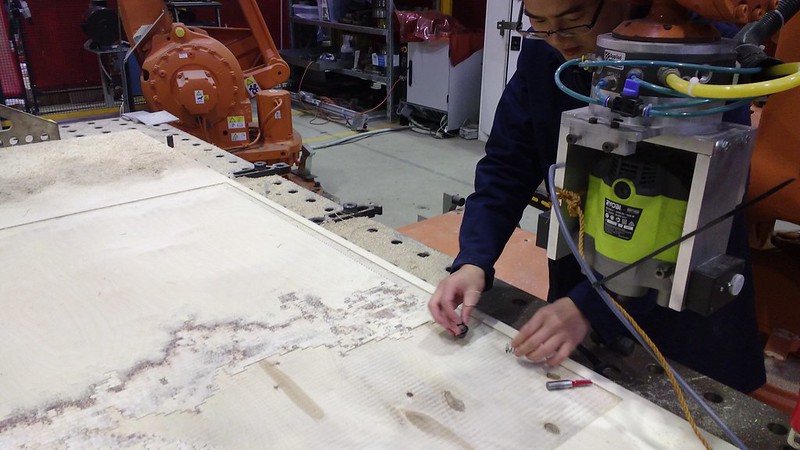
I have now realised that Stephen’s confidence was broadly based. His claims about the ease with which the robot can perform the task of fabricating a 3-d topographic model have a few caveats. In fact it is a highly experimental process and Donghong is immersed in an intensive process of problem-solving.

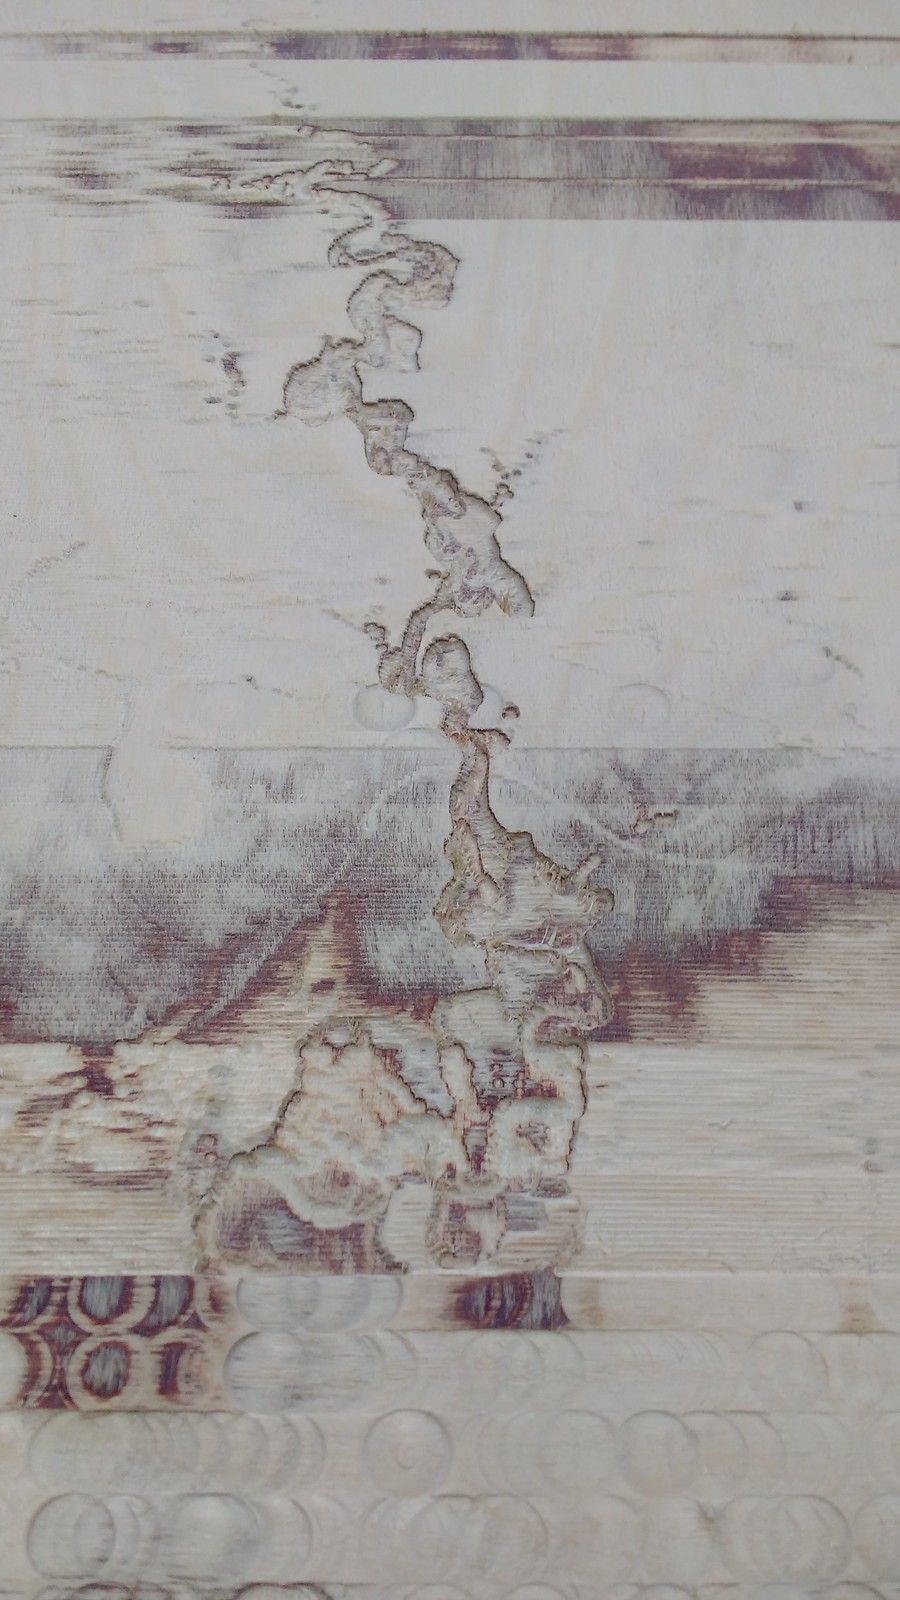
The robot they are using is like a giant articulated arm. For our 3-d model, it is fitted with a router which is subtractively carving the model in plywood, one sheet at a time from sea level upwards. It is a painfully slow process, depending on the size of the router bit being used at any given time. A 10mm router bit can do the gross cutting away of material, to be replaced with a 1 or 2mm router bit for the fine detail. The bands of plywood create very beautiful topographic layers which highlight the elevations through colour variation:
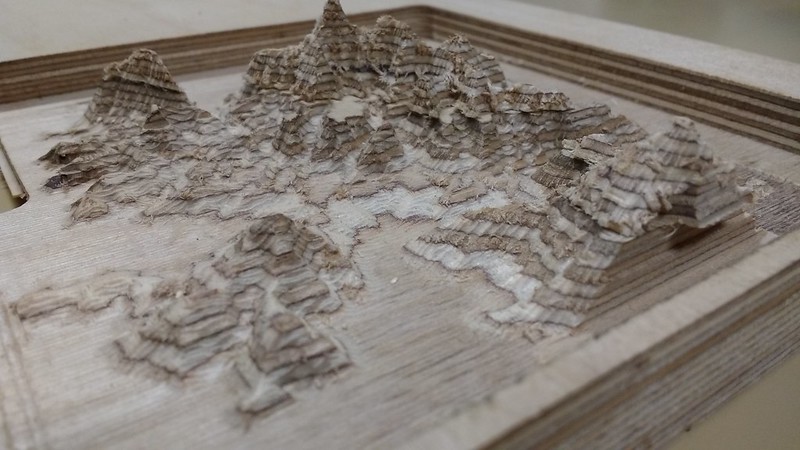
Donghong is grappling with the best way of configuring the robot to perform this task. He is doing this with industrial output in mind: how to use the least amount of materials and how to perform the task in the most time-efficient way. It is an incredibly slow process, as the robot moves the router back and forth across the plywood in tiny increments. To this point, using the method Donghong devised, the robot is still on the first sheet of plywood. Ultimately the work will require about six thicknesses of plywood sheeting to reach the required elevation.
As the elevation increases, the robot will eventually be cutting out very small shapes which represent slices of landmasses. Donghong then has to match the pieces and glue them together by hand. This strikes me as a very painstaking task, but in Donghong’s view it will be the most efficient and economical method. I am offering him some woodworking expertise when it comes to gluing and clamping. My job now is to make some soft weights, which I’ll probably make with socks and sand or rice. These will act as clamps, laid gently over the complex small shapes while they are being glued to their base layer.
Of course it would have been easier to just glue the requisite number of plywood sheets together and carve subtractively from the top down, but this would apparently lead to a 90% wastage of material. Donghong is not happy with the current cutting program, so it’s back to the drawing board – he is devising a new method which should make the job faster, so he will start the process again from the beginning.
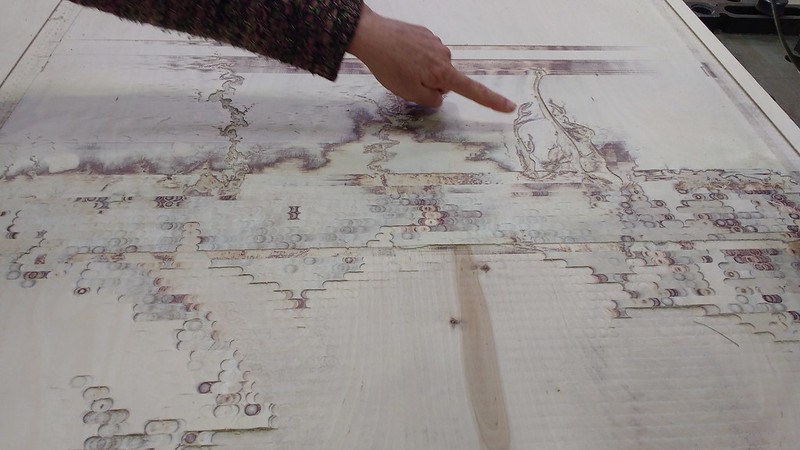
We asked if we could keep the test piece, as it has yielded fascinating marks and shapes and is a good example of an experiment-in-progress. Donghong was a bit bemused by our request – why would we want to keep a failure?
August 6, 2016 @ 7:03 am
Very interesting watching Mackay and surrounds emerge. It is so outside my world. Mailin
August 9, 2016 @ 7:00 am
Gorgeous project! Wonderful to see the plywood structure reflecting and enhancing the topographic information in this way. Echoes of architectural models here!
Eva
August 9, 2016 @ 7:04 am
Wow I agree that the proof of concept model is a beautiful in itself! So the darkened colour is beacuse the wood is getting burned?
August 9, 2016 @ 7:10 am
thanks Laura!
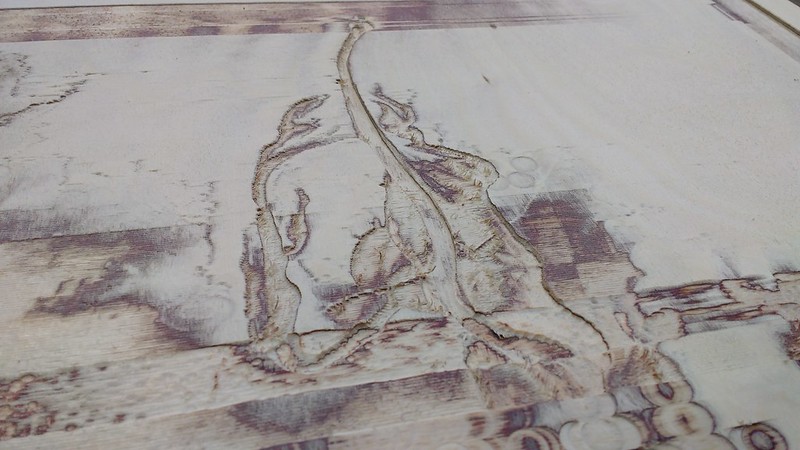
the dark and light colours are the layers within the plywood – so what you see depends on how deep the router has cut into the wood.